As an avid Mac user, I've often found myself wishing for a simple way to prioritise specific applications for optimal performance. While macOS doesn't offer an easy menu option for this purpose, I came across a handy command-line tool that has since become my go-to solution for boosting my app performance - the renice command.
In this post, I'll share my experience using the renice command to improve the stream quality of my OBS (Open Broadcaster Software) application, and I'll explain how you can apply this technique to other applications on your Mac.
So, what is the renice command, and how does it work?
renice command explained
The renice command allows you to adjust the priority of a specific process or application. When you run the command, you need to specify two key pieces of information: the priority number and the target application's process ID (PID).
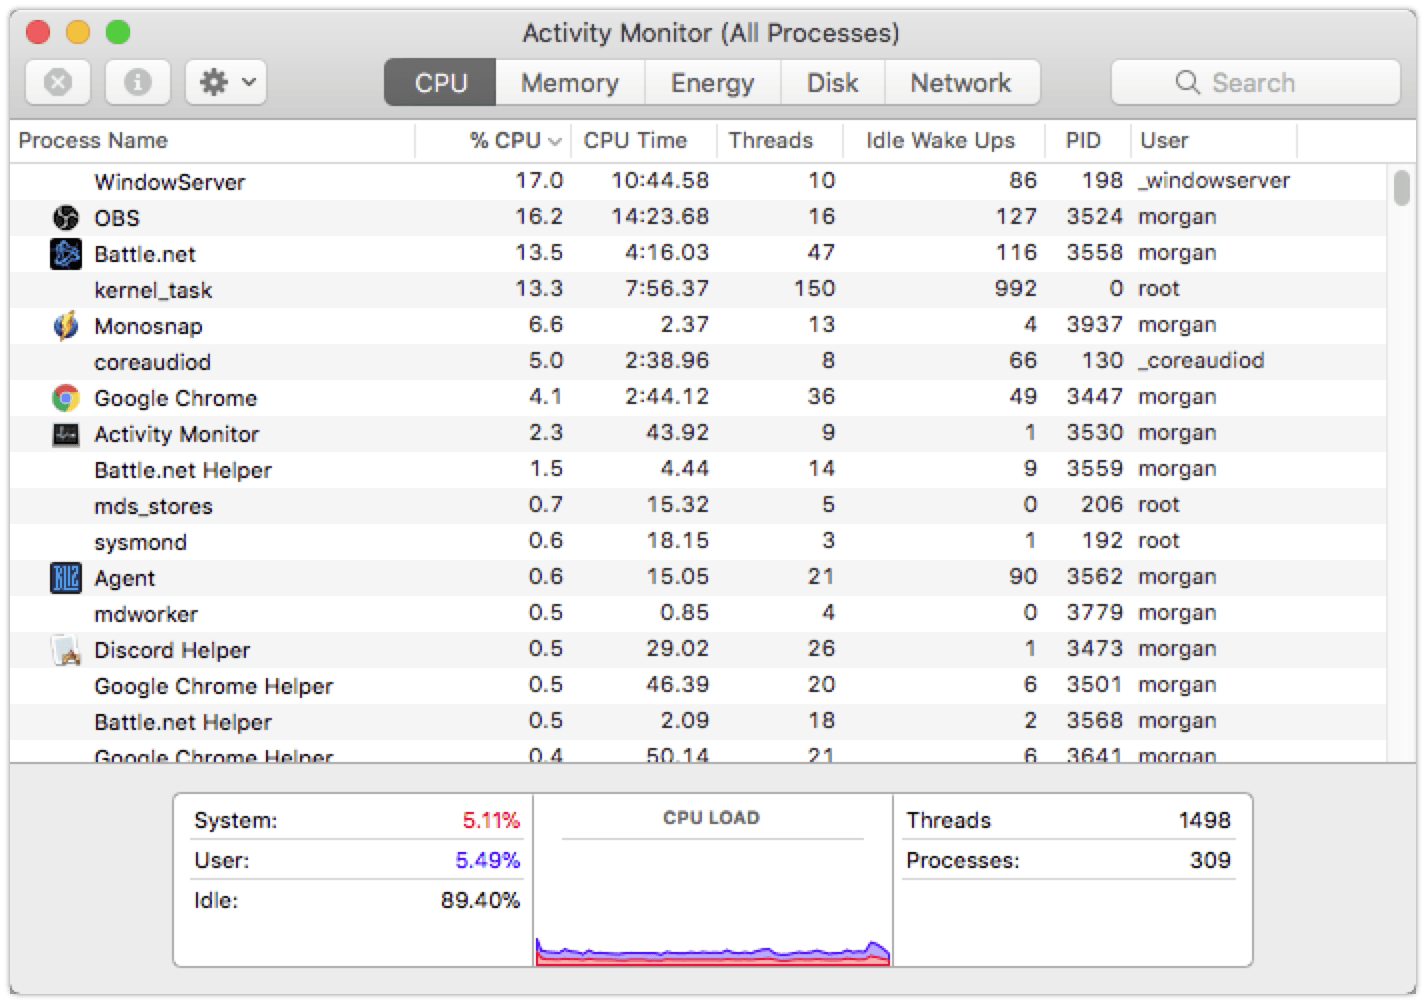
Priority numbers range from -20 (indicating the highest performance) to 20 (indicating the lowest performance). By default, all applications on macOS are assigned a priority of 0. The PID, on the other hand, is a unique identifier assigned to each running process. You can find the PID of a particular application using the Activity Monitor.
Here's an example of the renice command in action:
sudo renice -20 3524
In this example, I'm setting the priority of OBS (with a process ID of 3524) to -20, effectively prioritising it for maximum performance.

Now, let's break down the steps to reprioritise an application on your Mac:
- Open the Activity Monitor on your Mac and locate the application you want to prioritise. Note down its PID from the PID column.
- Launch the Terminal application on your Mac.
- Type in the command using the following format:
sudo renice [priority number] [PID]. Replace[priority number]with your desired priority level (-20 to 20) and[PID]with the application's process ID. Then, hit Enter. - If prompted, enter your administrator password. And that's it! Your chosen application should now be reprioritised for optimal performance. Keep in mind that this change is temporary and will be reset once you restart your Mac.
I hope you find this technique as helpful as I did in improving the performance of your applications on macOS.